INSTALLATION INSTRUCTIONS FOR DC-1200
SL-1200 Internal 20V
Regulator
1. Unplug AC power. Remove dust cover, platter mat and turntable
platter.
2. Remove 5 screws retaining the plastic cover.
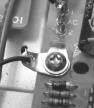
3. Refer to
the figure below and locate the left side ground mounting
screw.
Note there are 2 types of grounding lug. Shown is the PC style,
there may be a stand-alone lug with a short black wire attached.
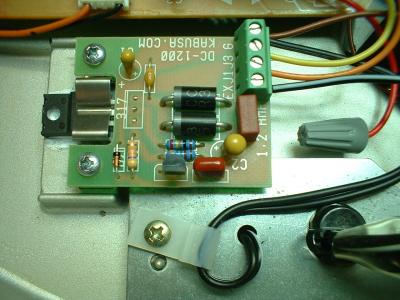
Locate and remove the 2 screws and clamp holding the original regulator power transistor. Cut the 3 wires where they attach to the transistor’s small circuit board. Using the screws supplied, install the DC-1200 board. The screws go through the top of the board, through the spacers, then through the original clamp and into the original transistor mounting position. Attach the wires as shown. Colors are likely correct, but instead, note the ID on the main motor board. Strip wires J1 and J3. Wire J2 is not reused.
Place J1 into the correct connector and tighten the screw. Just lightly
snug. Do not over tighten. Attach the Ground wire supplied to terminal G and
the main ground using the mounting screw in the bottom left of the main motor
board. Each board is pre-tested but it is a good idea to test it before
attaching J3. Turn the power on and confirm 20.5V between G and J3 on the
terminal strip. Once confirmed, remove power and attach wire J3 to the terminal
strip. If you are installing the PS1200GX now, route the supplied cable through
the small hole in the metal plate opposite the AC cord.(see arrow in Main View
Below) Place the positive (white stripe) lead into terminal EX and the
remaining ground wire into terminal G sharing with the main ground wire.
Check Your Connections
KAB ELECTRO ACOUSTICS
P.O.BOX
2922
PLAINFIELD, NJ 07062, USA
PHONE 908-754-1479
FAX
908-222-344